Image Synchronize #
Overview #
In the past period of time,when transferring images between public clouds, there will be occasional interruption of image transmission.The problem of mirror transmission interruption is multifaceted,and the problem of mirror transmission interruption is combined with the internal situation of the company.Through the mirror synchronization function,the container mirror can be synchronized from the source instance to the target instance,and the cross-public cloud platform is supported.
Check Image Synchronization List #
Operating steps:
Log in the MSP Platform
In the MSP Platform “All Products” navigation bar,click the Image Repository under the Container Cloud Platform module
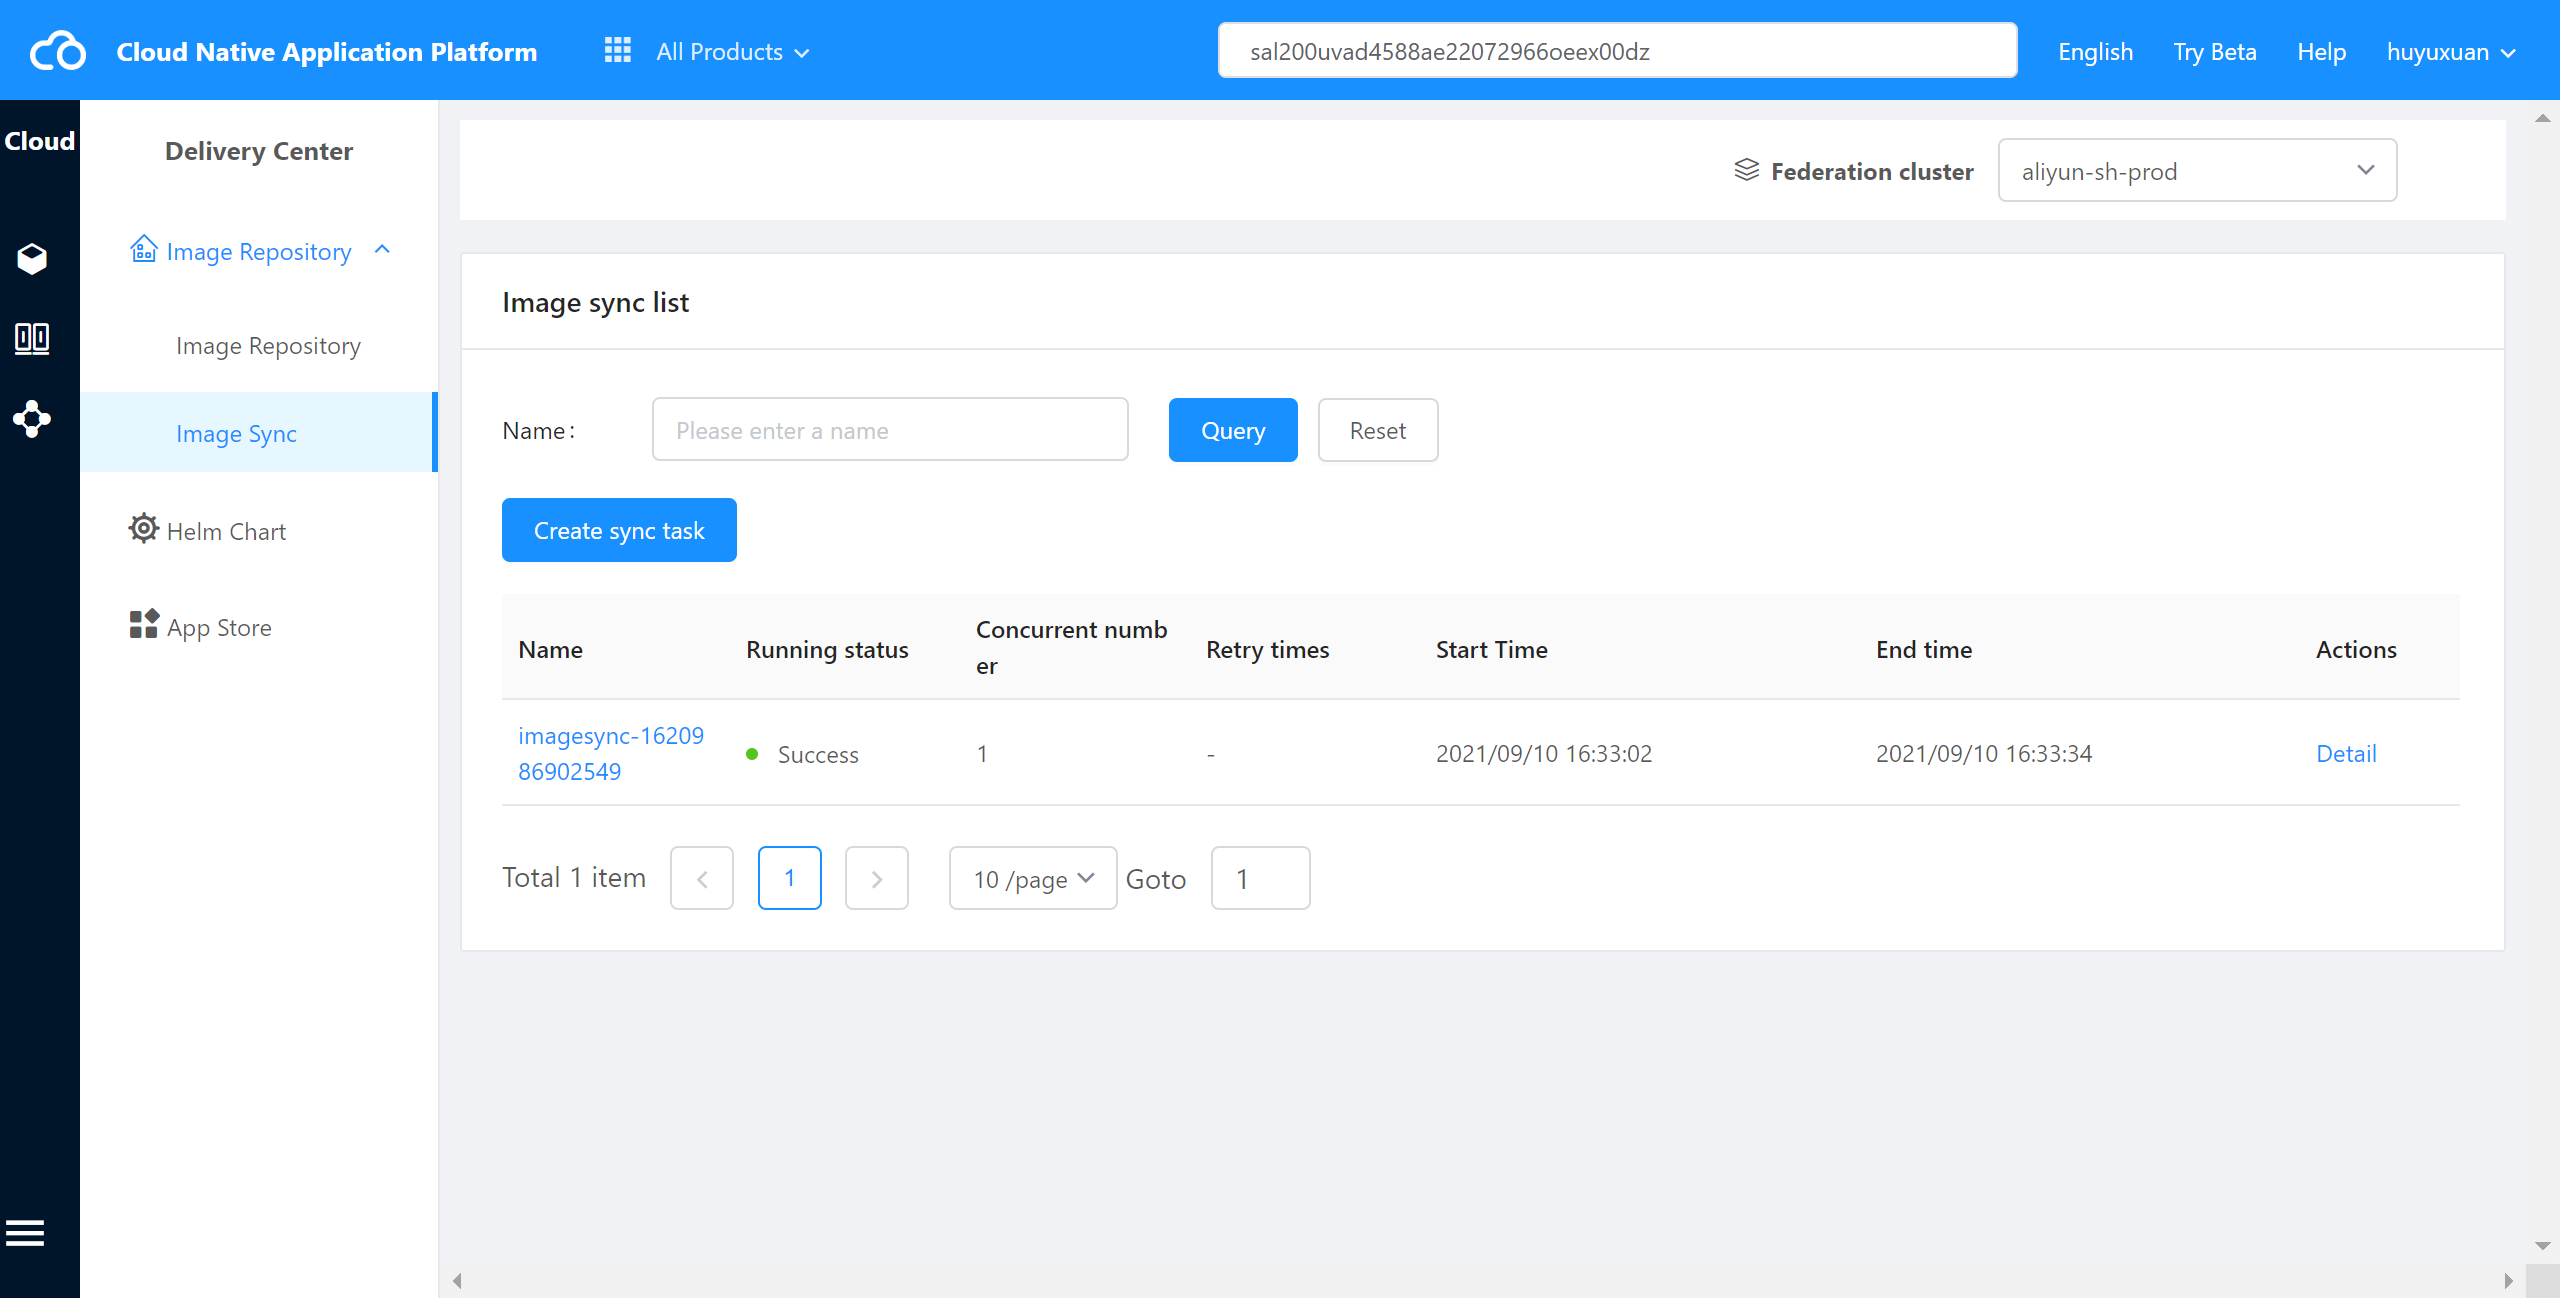
3)Click Image Synchronization to enter the image synchronization list page. Select a repository group and click to enter the image synchronization list, as shown in the following figure:
Create Synchronization Task #
Operating steps:
Log in the MSP Platform
In the MSP Platform “All Products” navigation bar,click the Image Repository under the Container Cloud Platform module
3)Click “Image Synchronization”,enter the image synchronization list page, and click Create Synchronization Task
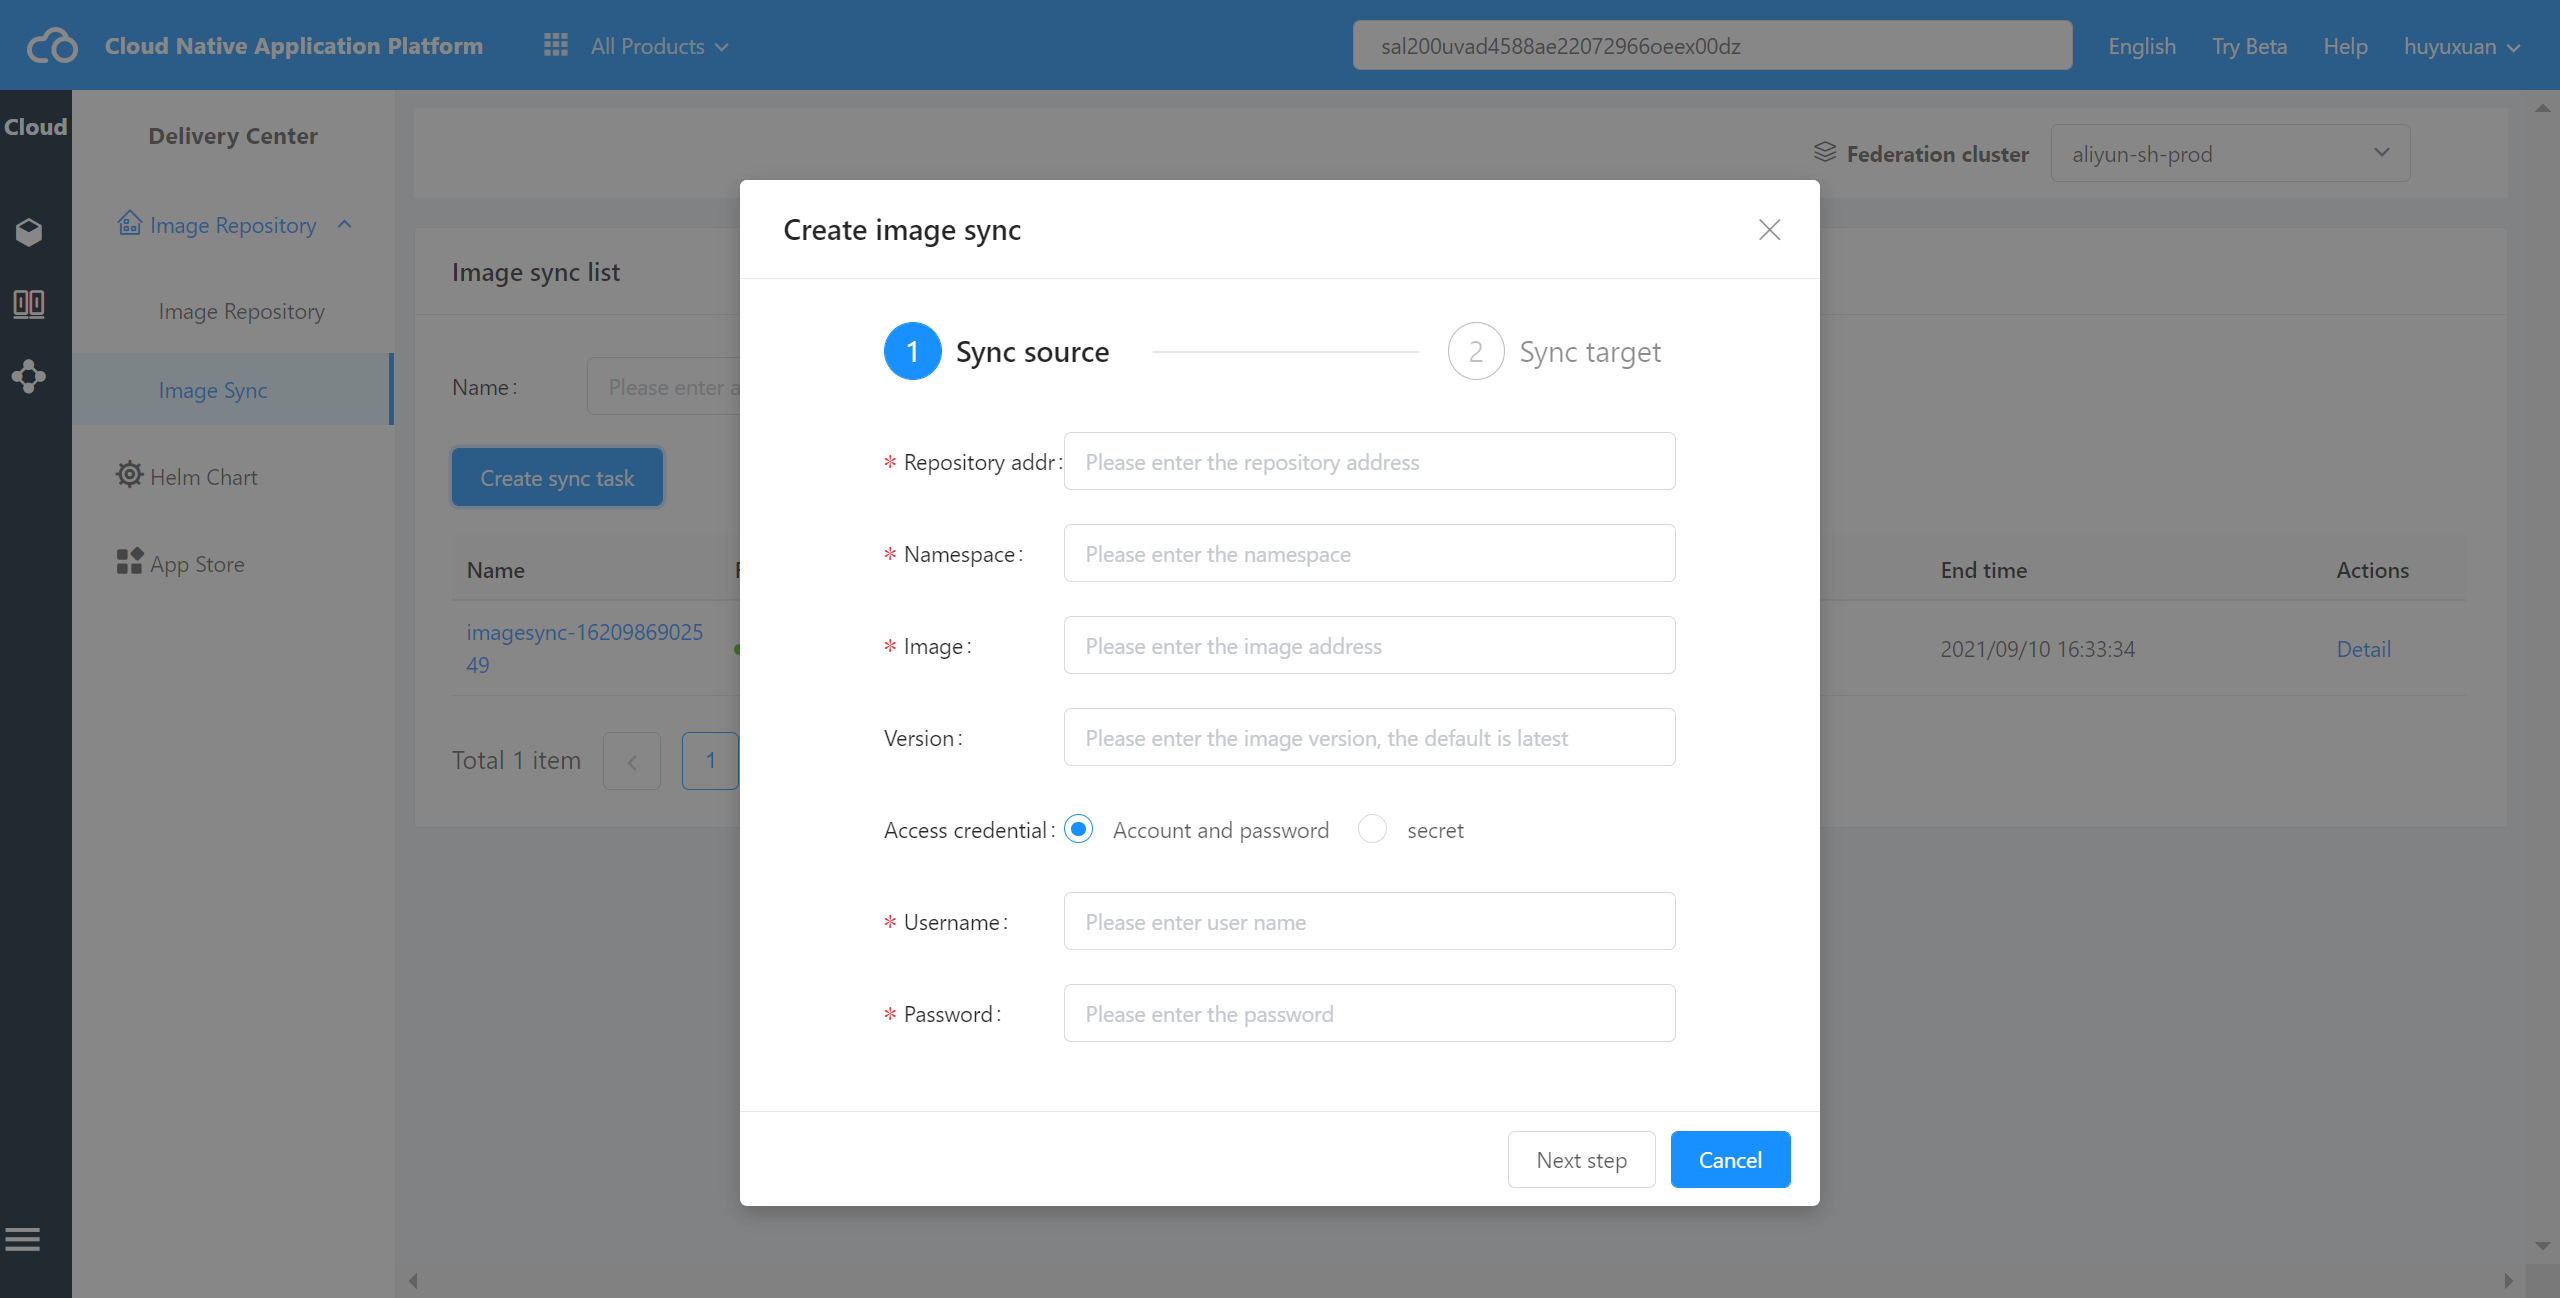
4)Step 1: Fill in the synchronization source information:
Repository Address: Fill in the public network address of the source image repository.
Namespace:Fill in the namespace of the source image repository.
Image:Fill in the mirror of the source image repository.
Version:Fill in the version of the source image
Access Credentials:Two ways are supported: key and account password.
Click next after completing the form:
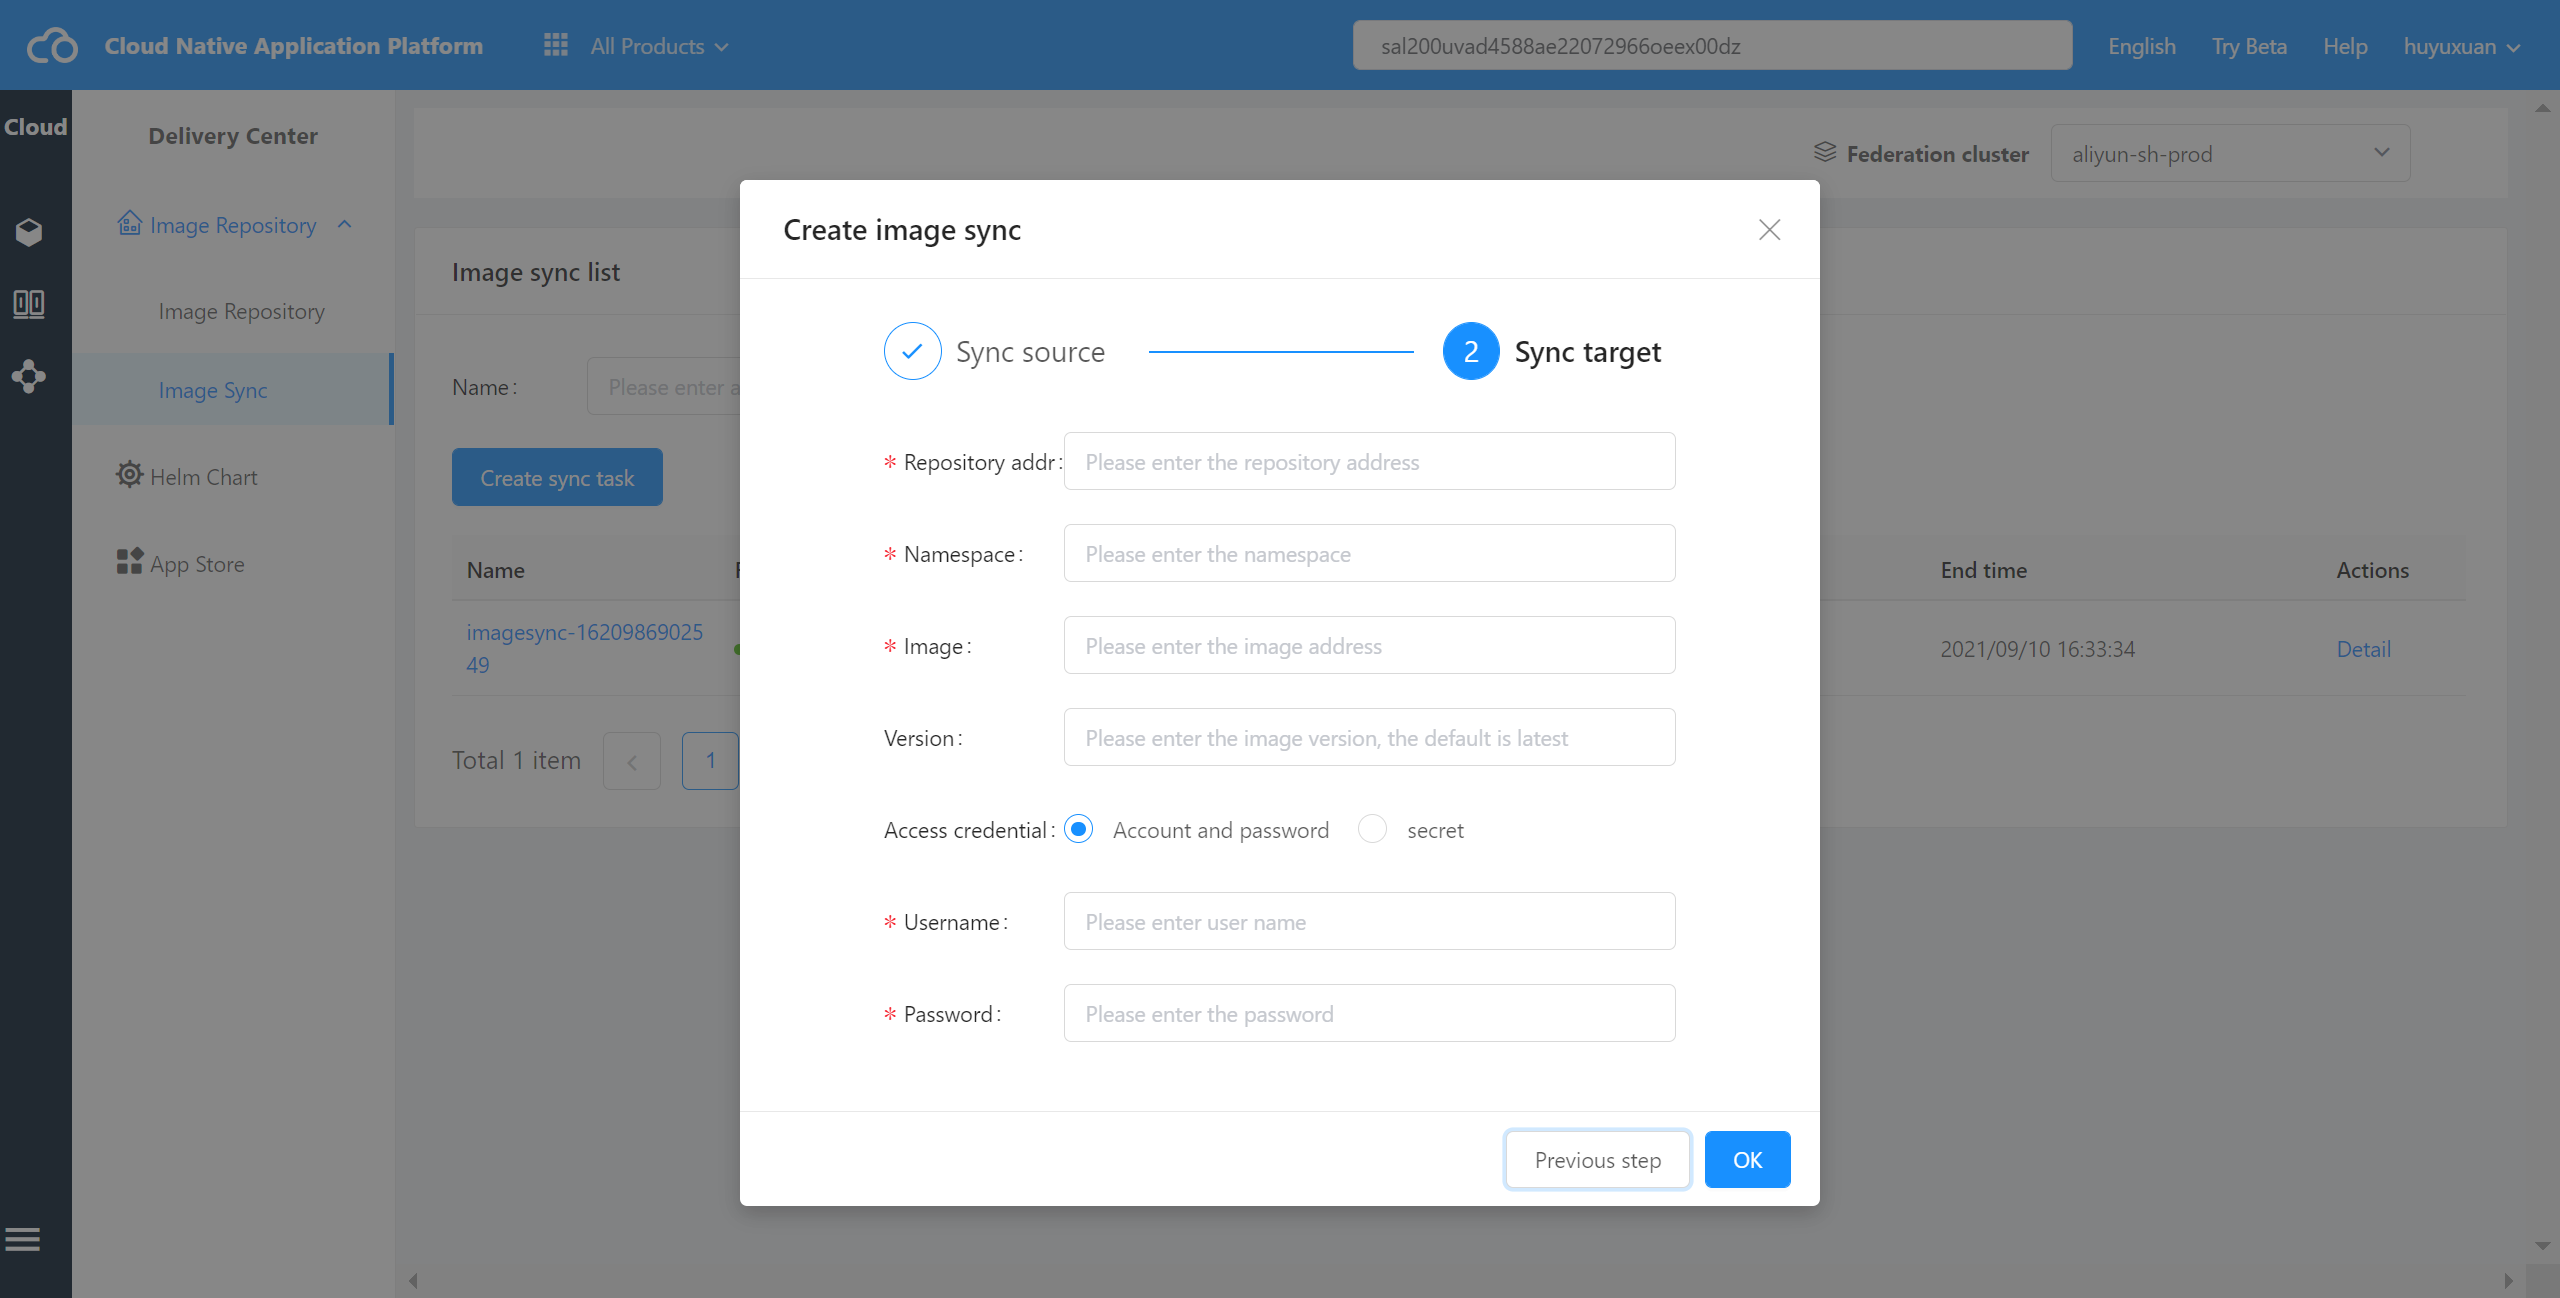
5)Step 2: Fill in the synchronization target information:
Repository Address:Fill in the public address of the target image repository.
Namespace:Fill in the namespace of the target image repository.
Image:Fill in the mirror address of the target image repository
Version:Fill in the version of the target image; if not, it will be the latest by default.
Access Credentials:Two ways are supported: key and account password.
Click OK after filling in to start creating.